Size and best practices
Size works differently in Stable Diffusion over, say, Photoshop. In a traditional software editing program, you go straight into a 4k canvas to produce a 4K image. Stable Diffusion is trained on much smaller images, typically 512×512 — and even then, it takes a powerful computer with a lot of video memory to make that magic work.
You can specify the resolution that you want, but caveat — AI models react unexpectedly to free-size resolutions. You’ll get twins, double heads, etc. And if you start too large, it takes much video memory to upscale it at all.
Best practices and shortcuts
To account for this, we created shortcuts that render the most compatible dimensions without burdening you to remember the exact pixel numbers. They’re easy to use:
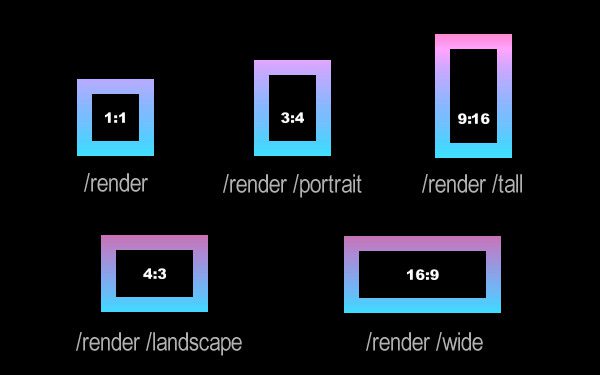
For beginners especially, we highly recommend starting with these.
Venturing into specific resolutions
You can use /size to specify a manual number, like this:
/render /size:832x1024
For best results, start with a resolution that can later be AI-upscaled 4x, instead of trying to do HD right away.
Recommended resolutions:
1024×576 (and then /facelift to near 4k)
576×1014
576×832
640×896
896×640
704×832
768×768
960×576
Any of these sizes will work well when AI upscaling.
Why not go straight into a larger size?
Glitches.
Multiples of 64 have the highest compatibility, but may result in unpredictable issues like multiple heads, cloned characters, etc. because the training data is based on small squares of 512×512, or 768×768. It would also take an insane amount of VRAM, it’s just not practical. Target one of these resolutions and then use AI upscaling to get the best-looking pictures.
Learn about the three modes of Facelift (and how to disable face retouching)
Also see: Steps