How to use ControlNet online with Stable Diffusion over WebUI or Telegram chat bot
ControlNet, as the name implies, is a popular method of controlling the overall pose and composition of Stable Diffusion images. It is most frequently used for posing characters, but it can do so much more.
ControlNet requires a photograph as an input, and there are many modes that you can choose from. You can use ANY rendered or uploaded image. This feature is available in both our WebUI and Telegram apps.
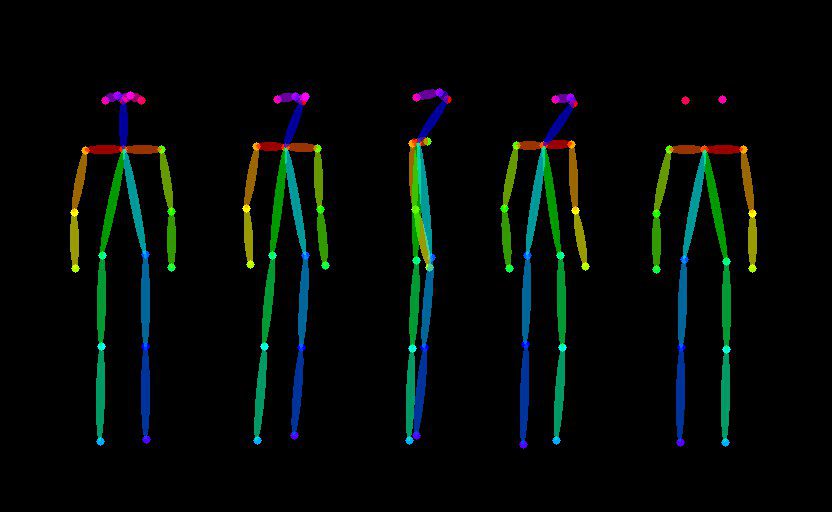
In this guide, we’ll explain what these many modes of ControlNet mean:

Here is a visual overview of what they each do.

Note pictured: faceswap, pose, and skeleton, but they are explained in this guide.
ControlNet from your WebUI
The ControlNet button is found in Render > Advanced. However, you must be logged in as a Pro user to enjoy ControlNet:
- Launch your /webui and login
- After you’re logged in, the upload image button appears
- After the image is uploaded, click advanced > controlnet
- Choose a mode
- Prompt as you normally would.
- If you know advanced controlnet parameters (explained in this guide), you can pass them in the positive prompt
Your uploads (controlnet presets) manageable in My Archive, along with reusable skeletons. You can upload your own poses directly into My Archive and reuse them here.
ControlNet from Telegram
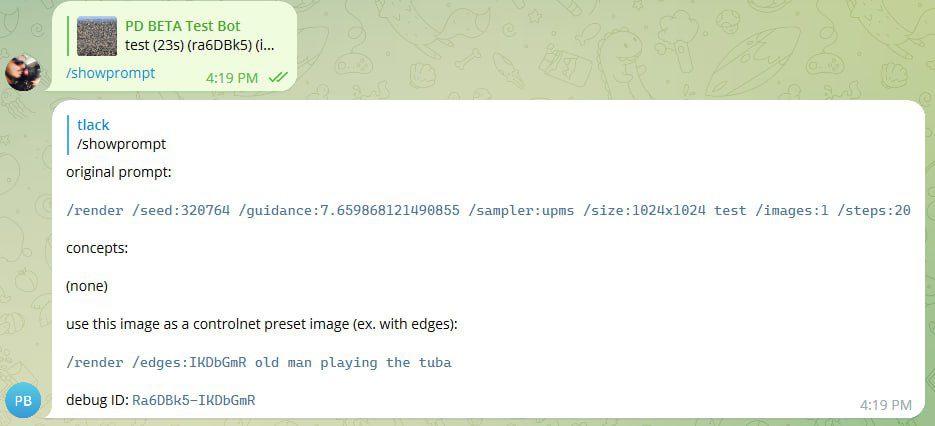
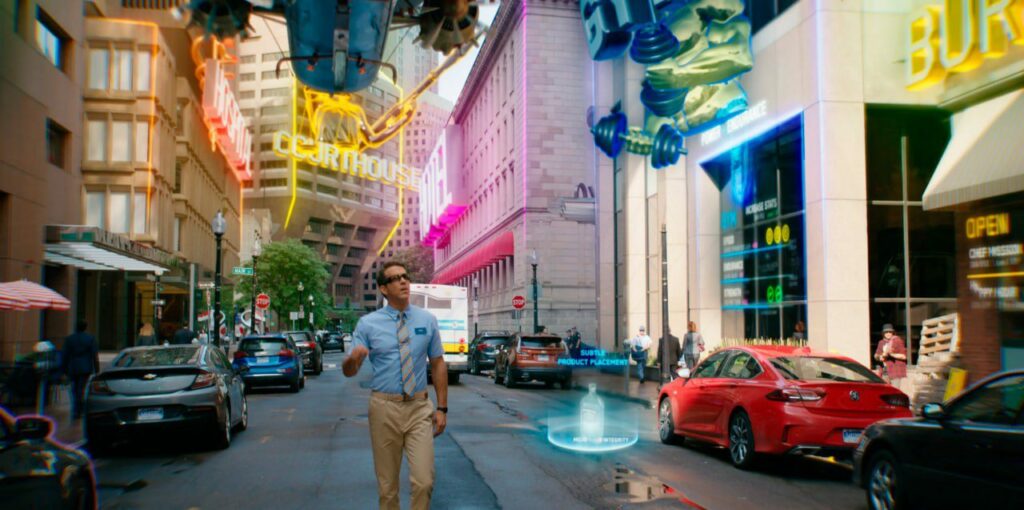
In this example below, we run a /showprompt command on an image . This is a photograph of a big city. Shall we use the outlines of a city, it’s little jaggy edges, to render an old man playing the tuba? Probably not! With ControlNet, the input photo should already resemble the target image you’re hoping to draw into. This is the first important concept to grasp. So let’s make a better target image first. This absolutely won’t do, but notice another thing about this image: A rendered photo has an image ID here of IKDdGmR. That’s how our bot knows what photo to use without selecting it. You can copy such codes.
So let’s make a photo we can actually work from first. A typical render using a base art model called Edge of Reality, aka
/render An old man walking down the street
Just to be playful, let’s render this Edge-based photograph by detecting it’s literal edges, the jaggy shapes of the man, with ControlNet.
The syntax
Photo IDs and where to find them
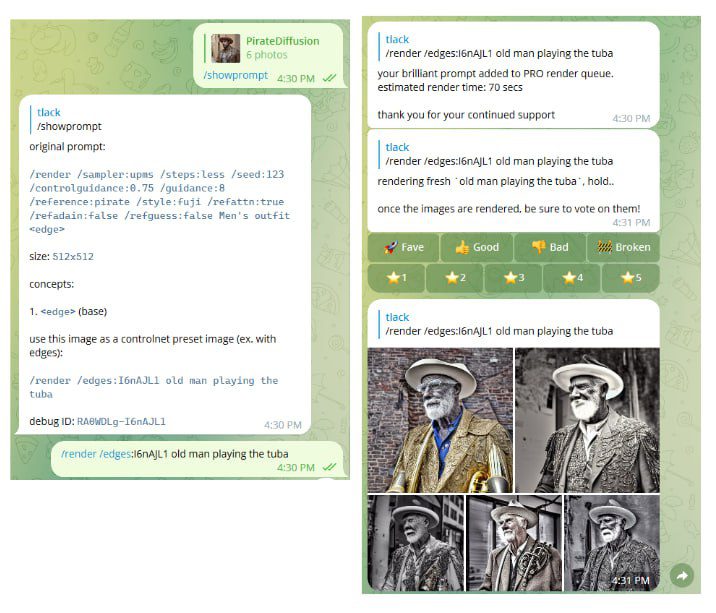
Rendered images have ID codes that can be copied into a ControlNet command. In the example above, /showprompt reveals the ID as l6nAJL1
/render /edges:l6nAJL1 your prompt goes here
The input photo’s edges were used to created to scaffold other images of an old man. But where’s the tuba? Maybe we should have used the poses mode instead. We’ll teach you the pros and cons of each mode and when to use them in this very thorough modes tutorial that follows.
/showprompt also gives you a code to perform a face swap
Save a photo as a preset
Aside from using rendered images for ControlNet modes, you can also store photos for reuse. If your photo isn’t a render, first upload it to the system and add it as a preset. The workflow looks like this:
- Upload a photo
- Save it as a ControlNet Preset (a reusable template)
- Render the preset using a mode (there are various)
You don’t have to reintroduce the photo every time to try every mode, it is stored for reuse. If you make a mistake, you can delete the preset. You can have an unlimited number of presets.
Rendering an old preset
Type /control to see a list of presets. In Telegram, presets live in the channels that they were created in, they are not global. This is for privacy.
If you already did this in the past
/control /new:mypreset (while uploading an image)
And immediately after, it is ready to be filled into:
/render /pose:mypreset a polar bear ballerina
Introduction to Modes
There are many flavors of ControlNet available, and we try to offer the ones that have the most power and versatility. One way to think about modes is as a strategy to explain to the AI what the picture contains. The better you and the AI agree on what the photo content is, the better you can manipulate it. For example, do you both agree on the edges, or the pose of a person?
Inquiring what the AI understood is called a mask. Below, you can see some examples of the different kinds of masks you’ll come across in this tutorial.
- Edges (Canny) — best for objects and obscured poses, where it creates a line drawing of the subject, like a coloring book, and fills that in
- Pose — best for people whose joints are clearly defined, but you want to completely discard the original photo’s finer details. Just the pose.
- Skeleton — Upload the ControlNet-extracted mask from a pose, and render from that skeleton’s pose. Can only be used as an input here.
- Contours (HED) — an alternative, fine-focused version of edges. This one and Edges retains the most resemblance to the preset image
- Depth – as the name implies, creates a 3D depth mask to render into
- Segment – detects standalone objects in the image
- Reference – attempts to copy the abstract visual style from a reference image into the final image (with an introduction to preprocessors)
Please take your time to learn each mode, as they are truly powerful.
How to use ControlNet Edges
Let’s adapt an iconic Bruce Lee pose and then make a puppet do it.
First, I paste the Bruce Lee photo. The actual image contents, Bruce Lee himself, will be discarded. A ControlNet preset is only going to store an understanding of the pose information, like his bone positions or shape.

So now, the photo of Bruce Lee is gone. But the pose is in.
Here, I have named the pose “bruceleestance” so I can easily remember it later. In the introduction, we briefly touched on masks: Masks are the best way to reconcile Controls.
Example of Masks
To reveal the mask, this command is used when rendering:
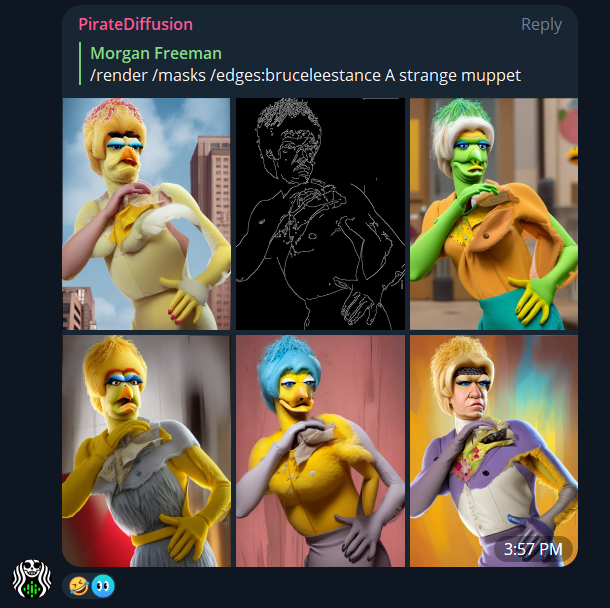
/render /masks /edges:bruceleestance a strange muppet
I can now immediately render anything in the world doing this pose. I can change this to a woman, a polar bear, a ninja, an old man, anything. And they will strike that same pose. What kind of poses do you wish your images could do? Find a good clean starting point image, and create a collection.
With your Graydient PRO account, you can create an unlimited amount of poses on our cloud. In groups like PirateDiffusion, you can use existing poses created by the community, or use your own bot in private folders/projects.
It’s literally that easy, and insanely powerful.
If you make a mistake or don’t like the preset, delete it like this:
/control /delete:name
Fine tune with controlguidance
You can control how much the effect is applied using a parameter for guidance, specific to the mode. This is different than /guidance, which pertains to the prompt (content information). ControlGuidance is a value between from 0.1 (lowest) to 2 (max).
/render A fighter /pose:brucelee /controlguidance:0.5
It’s not just for poses. We recommend the Egdges and Contours modes when working with objects and landscapes. Remember, you don’t have to redefine the preset every time, you can set it once and then render into every mode.
How to use ControlNet Pose
Poses works similarly to edges. You can reuse the same preset that you rendered your edges example with. The difference between Edges and Pose is fidelity: Edges considers the exterior shape. Pose tosses everything and only works from what it thinks the skeleton of the image is.

Prep your input image in the recommended best Stable Diffusion sizes to get the best results. Its not recommended to upload a 4k image, for reasons explained on that guide. You can always AI upscale to hit that resolution later.
For best results, the input image should be the same size as your target output resolution. Otherwise, text or fine details will be lost. If you upload the image at 800×600 you’ll want to render at 800×600, otherwise you’ll get a squished 512×512 image.
For example, I’m uploading a turnaround drawing.
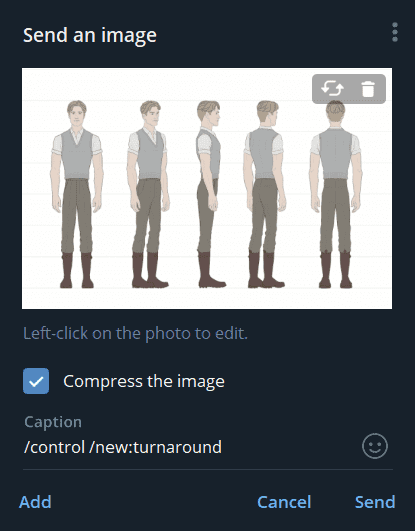
Look at the image above carefully: In the caption field, at the time of upload, I’m giving it the preset name “turnaround”
Now I can render that pose.

Upon closer inspection, you can see clean bone setups with no confusion.
Now I can render using my new preset, this time as a pose:
/render /pose:turnaround Lara Croft

With the general image now intact, I can take it into another style, upscale it, and do whatever I want with it. I can use remix to change into a different model that isn’t supported by ControlNet yet, like this:
/remix A realistic photo of Lara Croft

LET’S TRY masks AGAIN
Looking at the mask in Pose mode is very important, because unlike edges, the AI is trying to understand a bone structure. use the /masks parameter to reveal these colorful skeleton joints (see below)
Masks tells you how well the AI understood the image. In many cases you’ll find surprise information in there, like this person detected off to the right:

And that’s the basics of ControlNet Poses. For very tricky poses, especially involving multiple people, another solution is to create or find a LoRA that already has the pose. So you have two strategies to work from.
How to use ControlNet Skeleton
You can download the mask above and use it as an input, or other skeletons you find online. There are entire collections of them uploaded to Civitai.com
First upload your image and give it a name. You can do it at the time of upload, or you can assign the name after by replying to the photo with the command.
Let’s call this jumping pose “up up”
/control /new:upup
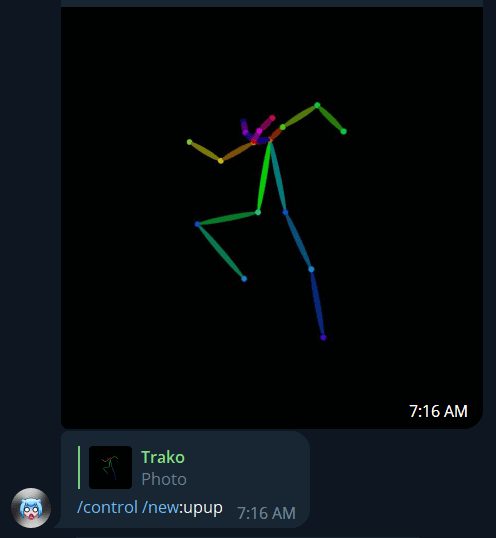
The preset is now ready, and the system gives you a general confirmation:
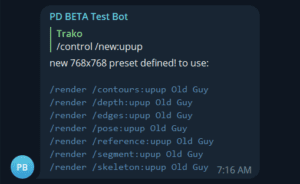
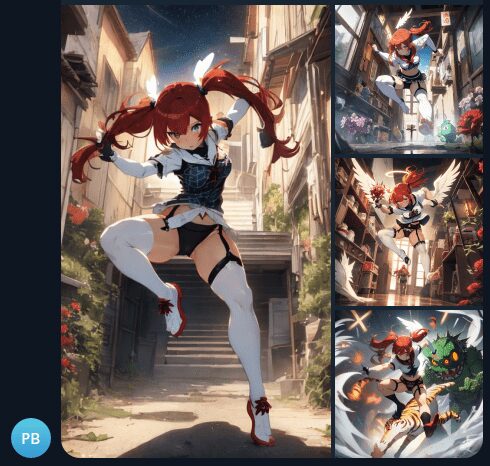
Now, be aware that this skinny figure can only be used by the /skeleton command. If you try to render edges with this, you’re going to get a very strange Tim Burton style skeleton cartoon figure. Let’s try Trako’s cool anime jumping pose prompt:
/render /skeleton:upup /guidance:8 /seed:678 /size:768x768 /steps:75 /images:4 /parser:new /clipskip:2 /format:png /sampler:dpm2m 2d, kicking a tiger, redhead, bangs, pigtails, absurdres, 1girl, angel girl, garter belts, training clothes, checkered legwear, white skin, cute halo, cross-shaped mark, colored skin, (monster girl:1.3), angelic, innocent, shiny, reflective, intricate details, detailed, dark flower dojo, thorns, [lowres, horns, blurry, bad anatomy, bad hands, text, error, missing fingers, extra digit, fewer digits, cropped, (low quality, worst quality:1.4), normal quality, jpeg artifacts, signature, watermark, username, blurry, monochrome, error, simple background,]
How to use ControlNet Edges
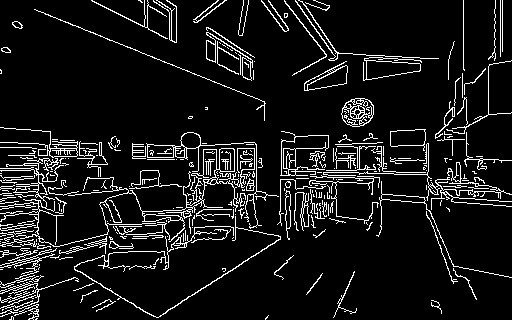
ControlNet is not just for poses. Look at this re-imagining of a house by defining an interesting camera angle instead of a person or object:

/render /masks /edges:A modern living room
You can also add /masks to see the edges that it detected, to spot problems:
How to make a preset for Edges
A preset is saved, reusable image data from a previous upload. You can continue to reuse these as inputs for ControlNet. You can have an unlimited number of presets, and delete them if you make a mistake.
Step 1: Type (forward slash) control to see list of presets
/control
A message like the one below will appear. Similar to your personal styles, your personal presets will be saved here as a list.
Step 2: Download this image to your local device
Step 3: Send that image into your private bot chat
Next, copy and paste the image (or) upload it to your private bot. Check the “use compression” box if asked.
Notes: Don’t forward the image or paste the URL though: literally get that sucker in there as a binary file. The actual photo needs be added to the room’s media gallery (not linked externally)
For experts: You can combine steps 4-6 into one by sending the command in the text field of your upload. You don’t have to, but it’s faster.
Step 4: Select the image by replying to it, like it’s people
Just like you do for Remix and Facelift, select the image in your chat by tapping on it, and long press or right click to Reply to the picture, as if you were going to talk to it. See the figure below, where it says Reply under the emoji. This will make a text box appear at the bottom with the image selected.
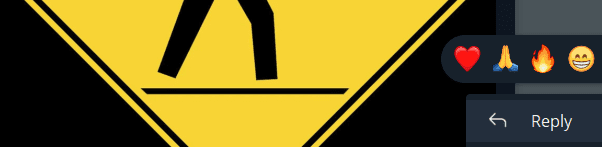
A thumbnail of the image should now appear near the bottom of your device. Move your mouse or tap that chat area to continue.
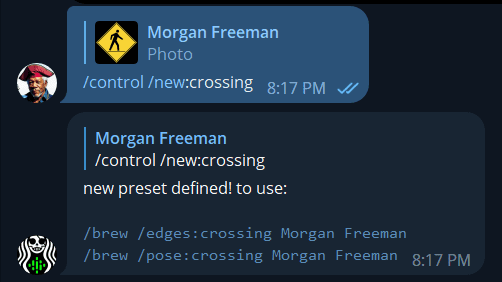
Step 5: Send a chat command that gives the preset a name
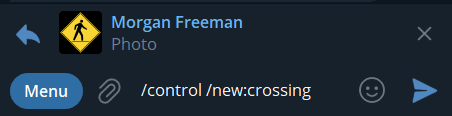
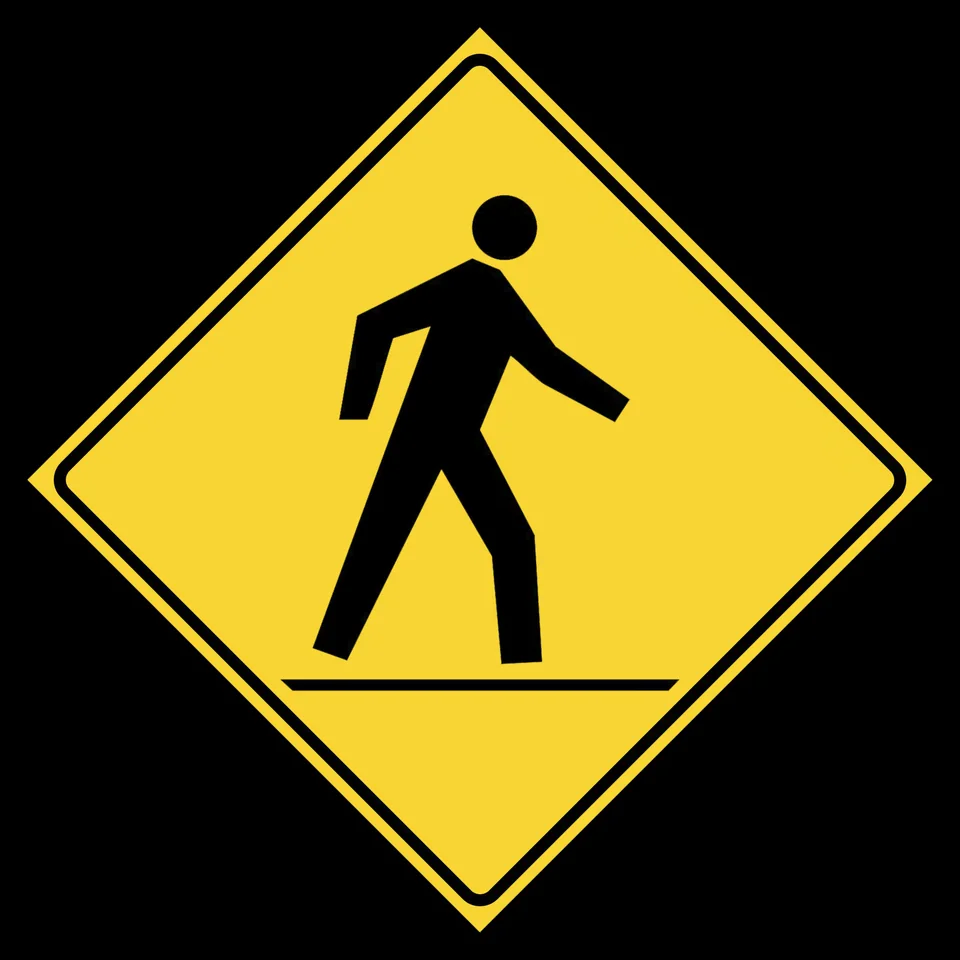
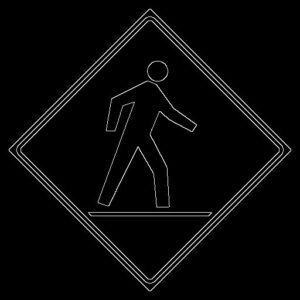
I’m going to call this preset “crossing”, so I will reply with:
/control /new:crossing
Important: Notice that I’m not deciding at this very moment if this picture is going to be used in a pose or an edge.
You can use a preset with any mode of ControlNet later. You don’t have to decide at creation, you’re only saving the picture. If you did it correctly, the bot will then reply with “new preset defined!”:
Step 6: Let’s try out your preset in a render
I recommend using /render instead of /brew, for this tutorial:
/render /edges:crossing Freddy Krueger
^ here I’m saying, use render (don’t add extra words) and use the “edges” mode of ControlNet (we don’t have to write /control when making images) and call my preset called “crossing”, followed by my prompt “Freddy Krueger”

Pretty cute, even for Freddy.
Debugging with /masks
Want to be sure if ControlNet understood your shape correctly? Add the command /masks after render, and before the mode, to see how it “understood” the input. If you’re getting distorted people from a pose, this will help you understand why. Here’s what the edges of my first preset look like:
/render /masks /edges:crossing freddy kruger
This image has clear edges, so we know it’s going to work fine. But did ControlNet understand this image to use with pose?
/render /masks /pose:crossing Freddy Krueger
Results – See image 2, the black box? Unsurprisingly, a diamond shaped sign with a tiny cartoon isn’t a clear and convincing human pose.

Had it worked, the pose skeleton appears in image 2. Thus, the resulting images are random images and not controlled at all. By debugging with /masks, you can pick out problematic poses and bad presets.
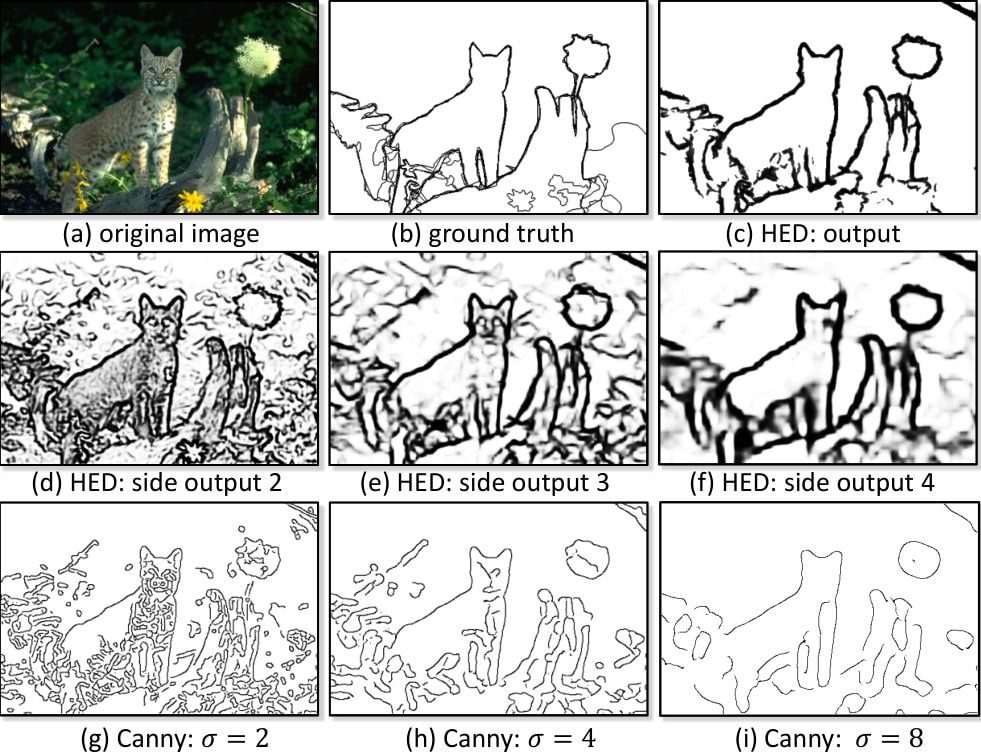
How to use ControlNet Contours
COUNTOURS aka HED mode is similar to Edges. Compare the HED outputs to the EDGE (canny) output below. In some cases, Contours is a better choice.

/render /masks /contours:handbag /steps:more dramatic product photography, a fashionable leather handbag with gold buckles on an executive desk, sexy woman in the bokeh background, ((8k, intricate details, high fashion, absurdres))

By calling contours combined with the realistic model “realvis20” I’m able to make thousands of realistic design variations of this handbag everyday. Seriously powerful.
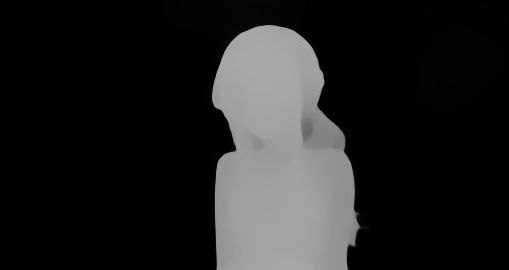
How to use ControlNet Depth
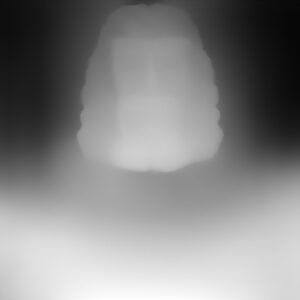
It’s almost identical to contours and edges, but use /masks and you’ll see that it creates a depth map of your input image. Rendering into depth can produce mind-blowing realistic images that seem to pop off the page.
/render /masks /depth:presetname
Limitations:
- Depth sometimes hallucinates extra information based on the shape of the object, meaning you may end up with unwanted extras. Meaning you may think the background of your render will be void of objects but it did pick up on stuff even though you can’t see it. We think this has something to do with the model’s training, so unnatural images may confuse it.
-
It can’t really do cut out images. Edges and Countours are perfect for cutting out a shape or person and placing them on a blank canvas, it will fill the rest of the scene and look very cool, depth though doesn’t appear to work at all on these images
-
In some cases the image will have this feathered, haze surrounding the subject rather than having a sharp edge which will affect the background
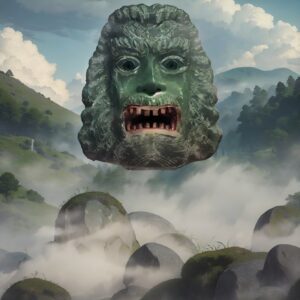
Example of hallucinated depth extras when using a very unusual preset:
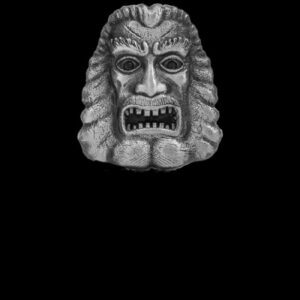
Example:
/render /depth:floatingidol Floating stone idol, disembodied head, floating idol, misty rolling green hills, wide open mouth ((best quality, masterpiece, intricate detail)) [[low resolution, worst quality, blurry, plain background, white background, simple background, normal quality, 6 fingers, extra fingers, broken fingers, bad quality]]
How to use ControlNet Segment
Segment Anything is the odd bird in this collection. As the name implies, it gives you a segment image. Here is the whitepaper for a deeper dive. It is not a way to prompt into individual segments of the image, though.
Like the other modes, first give an image as the preset…
Then use /render /segment:presetname
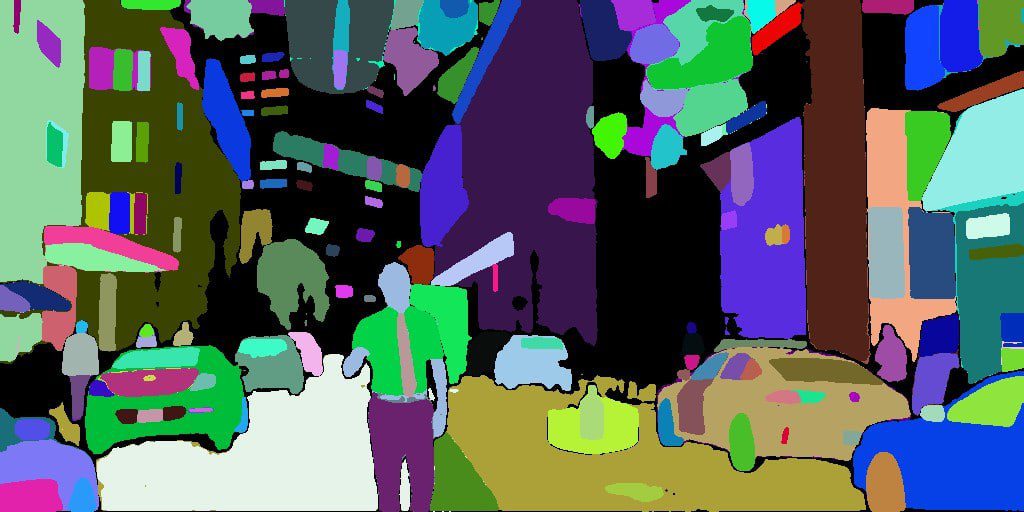
Segment Limitations and Bias
- The model can’t render text
- Landscapes with fewer segments tend to render better
- Some segmentation maps tend to render in monochrome (fix it with a negative prompt)
- Some results can be overly saturated
- Shorter prompts work best
- The model is biased towards paintings rather than realism
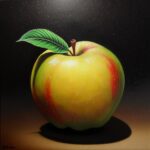
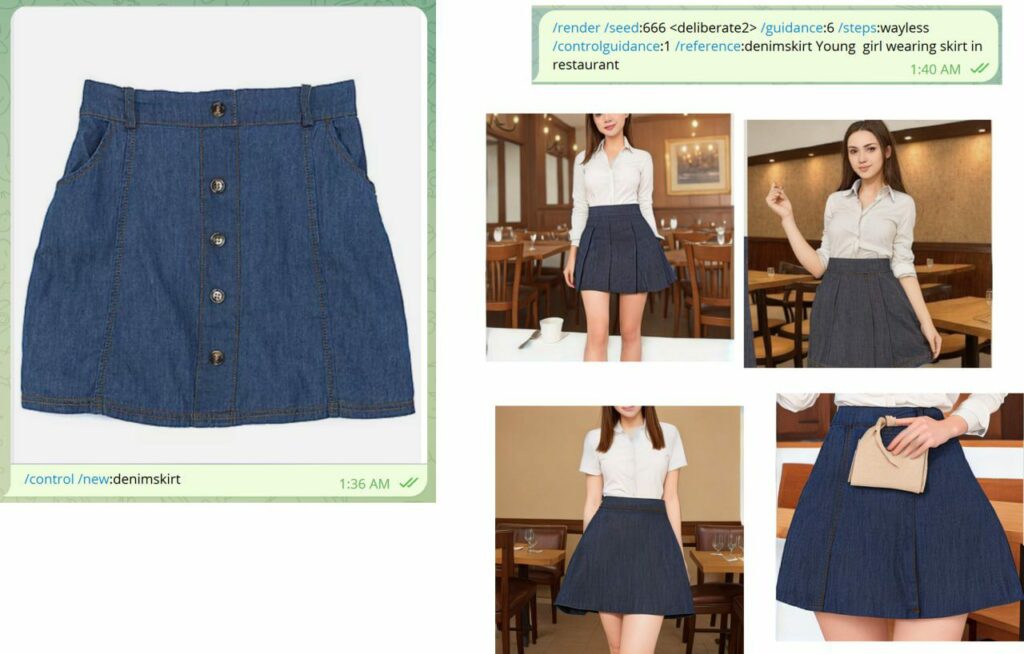
To follow this example, download this apple and define it as a preset. Then we can render into it in step 2.
Step 1:
/control /new:apple768x768

Then try this example prompt:
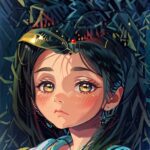
Step 2:
/render /masks /segment:apple768x768 oil painting, apple girl, kawaii, 1girl, cute, round face, hair ribbon, fruit accessory, isolated on a black background, shiny, masterpiece, saturated, dramatic lighting, good quality, [lowres, blurry, worst quality]

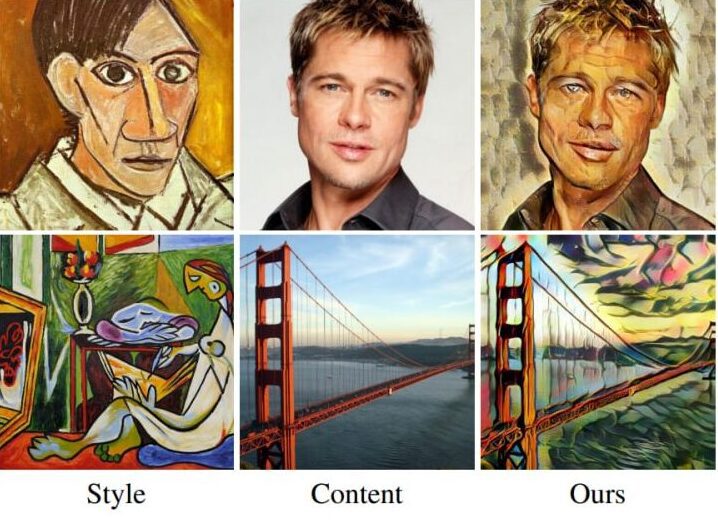
How to use ControlNet Reference
Consider these inputs on the left, and the resulting image on the right. There is style, content, and the result. As you can see, both inputs are considered.
INTRODUCING Reference Preprocessors
Reference adain: Style transfer via Adaptive Instance Normalization
/refadain:true or /refadain:false
Reference only: Link the reference image directly to the attention layers
/refattn:true or /refattn:false
Reference adain+attn: Combination of above.
/refguess:true or /refguess:false
What this looks like in action:
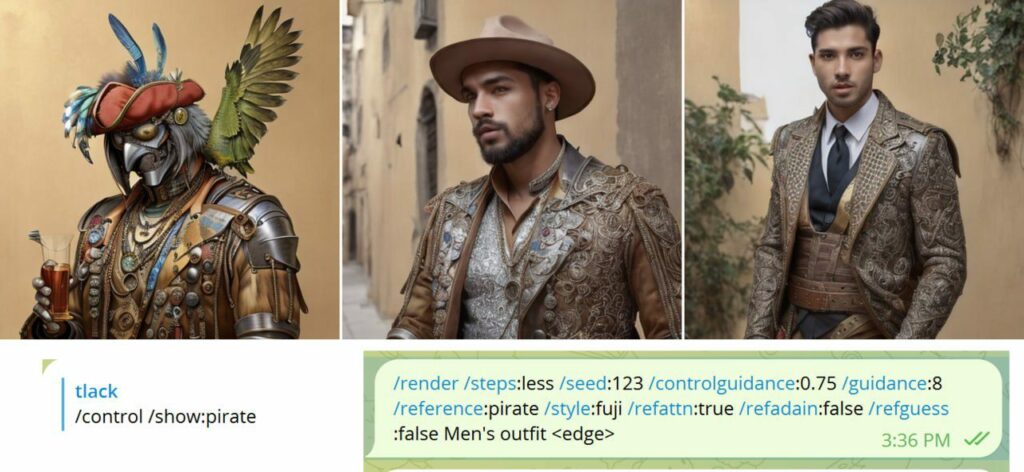
More examples:
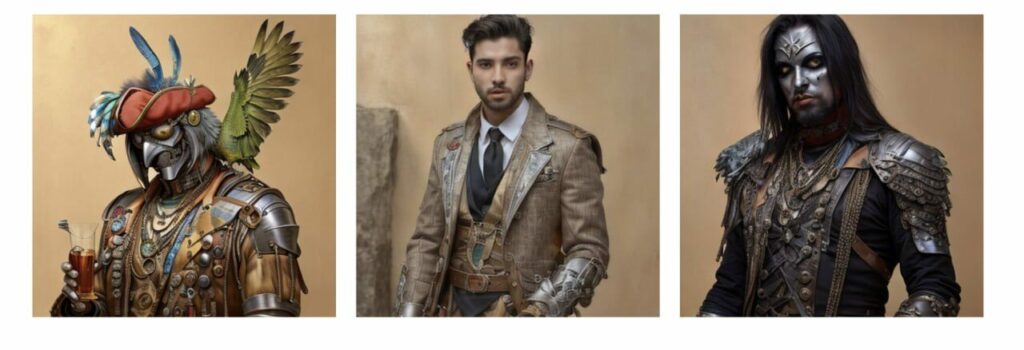
Left: Input. Center “men’s outfit” Right “Men’s Metal Outfit”
This is a bad result example when preprocessors are not used:
Please take your time and study the pre-processor modes as well as control guidance to achieve realism. Otherwise, the effect looks 2D and stiff.
FAQ & Troubleshooting
Can I delete a preset?
Yep. /control /delete:presetname
What are masks?
Masks help you see what the AI is thinking. You can’t render a mask as an input, this is just for troubleshooting. Just add /masks after your /render to use it
Can I use /more with ControlNet?
Yes! You can get more results back without having to repeat the steps. Just right click on any controlnet render and reply to the image with /more
What is the difference between Remix and ControlNet?
Very different. Remix is unaware of things like joints and anatomy. Remix is a raw style transfer tool, where you can select one of our many AI models to transfer into. Remix requires models to be formatted in a certain way.
ControlNet, on the other hand, excels at posing human limbs. However, it needs specific models to work. By default, it renders in stock Stable Diffusion. Unfortunately, the Control Net format is different from Remix. We hope that they become compatible in time, but right now, it’s an extra step.
Why doesn’t it see my photo?
If you didn’t encounter an error, then skip the troubleshooting section below.
If you get an error here like “unknown prompt” it means that Pirate Diffusion is not an administrator in the group, and has no access to photos. This is what a bad group configuration looks like. Your image will be ignored, in this case:

That group’s owner must edit the group, edit administrators, and add PirateDiffusion as an administrator, and then use the /email command to give that group rendering perks again. Also — images previously sent to the room cannot be read, so delete the image and load it again after the bot is an admin. Make sure:
-
- The image is selected properly before replying
- The image was uploaded with “compression on”. If the photo doesn’t appear edge to edges, and it is showing little a little small box, it was sent as a “file”. Some Android photo managers have folder shortcuts that cause this. Navigate directly to the file.
Are we missing your favorite ControlNet mode?
If we don’t have the mode you’re looking for, please suggest it on our open community roadmap. We’re adding new features every week, give us a shout